반응형
HashiCorp Nomad Cluster 구성(install nomad cluster)
HashiCorp Nomad를 사용하여 멀티 서버 기반 Nomad 클러스터(Server + Client)를 구성하는 방법입니다.
테스트 환경
| 호스트 이름 | 서버 아이피 | Type | 비고 |
| control1 | 192.168.0.51 | server | |
| node1 | 192.168.0.61 | server | |
| node2 | 192.168.0.62 | server | |
| node3 | 192.168.0.63 | client |
1. Nomad 설치
nomad 설치 : https://scbyun.com/1494
버전 확인
nomad --version2. Nomad Server Cluster 구성
Server 노드 설정 (control1, node1, node2)
각 Server 노드에 동일하게 /etc/nomad.d/nomad.hcl 파일을 설정합니다.
vim /etc/nomad.d/nomad.hcl[control1-nomad.hcl]
data_dir  = "/opt/nomad/data"
bind_addr = "0.0.0.0"
server {
  # license_path is required as of Nomad v1.1.1+
  #license_path = "/opt/nomad/license.hclic"
  enabled          = true
  bootstrap_expect = 3
}
client {
  enabled = true
  #servers = ["127.0.0.1"]
  servers = ["192.168.0.51","192.168.0.61","192.168.0.62"]
}
bootstrap_expect = 3 → Raft quorum을 위한 Server 노드 수
[node1-nomad.hcl]
data_dir  = "/opt/nomad/data"
bind_addr = "0.0.0.0"
server {
  # license_path is required as of Nomad v1.1.1+
  #license_path = "/opt/nomad/license.hclic"
  enabled          = true
  bootstrap_expect = 3
}
client {
  enabled = true
  #servers = ["127.0.0.1"]
  servers = ["192.168.0.51","192.168.0.61","192.168.0.62"]
}
[node2-nomad.hcl]
data_dir  = "/opt/nomad/data"
bind_addr = "0.0.0.0"
server {
  # license_path is required as of Nomad v1.1.1+
  #license_path = "/opt/nomad/license.hclic"
  enabled          = true
  bootstrap_expect = 3
}
client {
  enabled = true
  #servers = ["127.0.0.1"]
  servers = ["192.168.0.51","192.168.0.61","192.168.0.62"]
}
Nomad 서비스 재시작
systemctl daemon-reloadsystemctl restart nomadsystemctl status nomad --no-pagerServer 클러스터 상태 확인
nomad server membersName Address Port Status Leader Raft Version Build Datacenter Region
control1.global 192.168.0.51 4648 alive true 3 1.4.3 dc1 global
node1.global 192.168.0.61 4648 alive false 3 1.4.3 dc1 global
node2.global 192.168.0.62 4648 alive false 3 1.4.3 dc1 global728x90
Nomad UI 접속
- Nomad Web UI는 Server 노드의 4646 포트에서 제공됩니다.
http://192.168.0.51:4646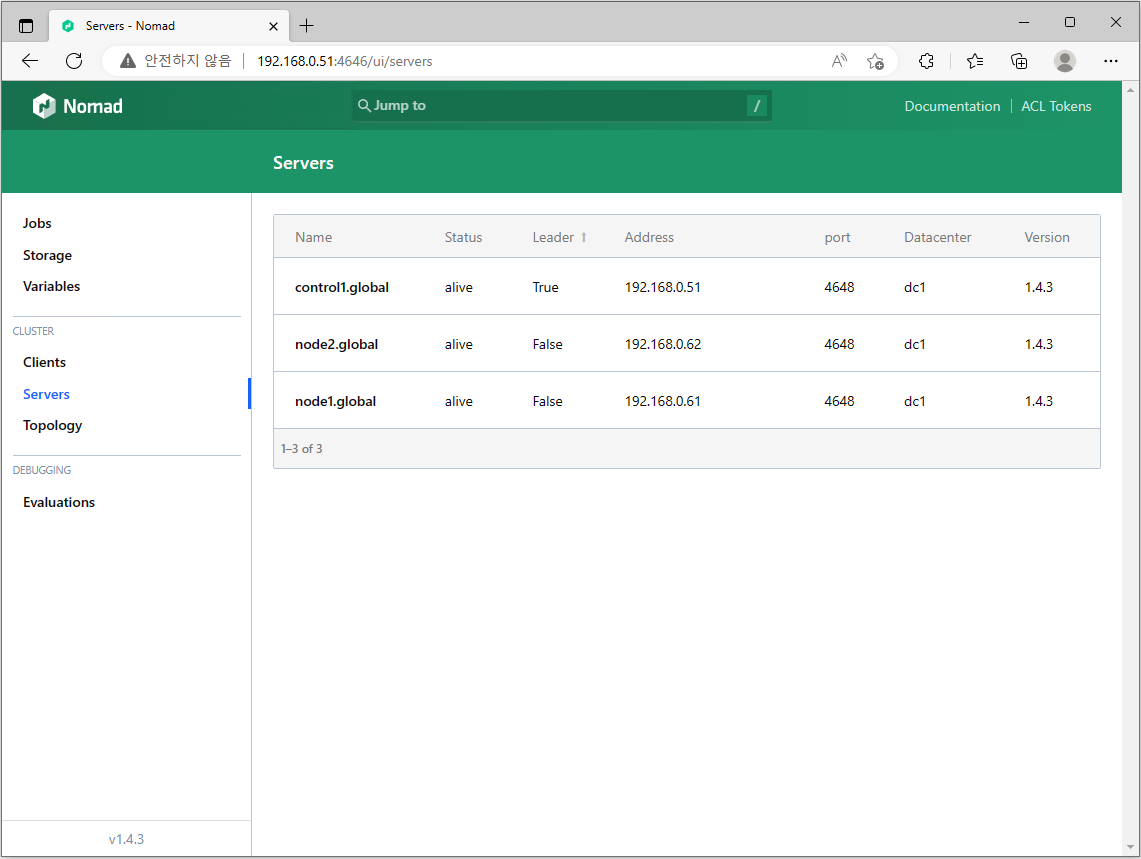
3. Nomad Client 노드 조인 (node3)
Client 설정(/etc/nomad.d/nomad.hcl)
vim /etc/nomad.d/nomad.hcldata_dir = "/opt/nomad/data"
bind_addr = "0.0.0.0"
server {
# license_path is required as of Nomad v1.1.1+
#license_path = "/opt/nomad/license.hclic"
enabled = true
bootstrap_expect = 1
}
client {
enabled = true
#servers = ["127.0.0.1"]
servers = ["192.168.0.51","192.168.0.61","192.168.0.62"]
}Client 노드에서는 server.enabled = false 권장
Client 서비스 시작
systemctl --now enable nomad.servicesystemctl restart nomad.servicesystemctl status nomad --no-pager전체 노드 상태 확인
nomad node status$ nomad node status
ID DC Name Class Drain Eligibility Status
dd63a4bf dc1 node3 <none> false eligible ready
891057c0 dc1 node1 <none> false eligible ready
b05fdccc dc1 node2 <none> false eligible ready
ecbbbd59 dc1 control1 <none> false eligible readyNomad UI 접속
- Nomad Web UI는 Server 노드의 4646 포트에서 제공됩니다.
http://192.168.0.51:4646
Nomad 수동 설치 스크립트
- nomad releases : https://releases.hashicorp.com/nomad
#!/bin/bash

wget -q https://releases.hashicorp.com/nomad/1.4.3/nomad_1.4.3_linux_amd64.zip
unzip nomad_1.4.3_linux_amd64.zip
sudo mv nomad /usr/bin/

mkdir -p /etc/nomad.d /opt/nomad/data

cat <<EOF | sudo tee /etc/nomad.d/nomad.hcl
data_dir  = "/opt/nomad/data"
bind_addr = "0.0.0.0"
log_level = "INFO"

server {
  enabled          = true
  bootstrap_expect = 1
}

client {
  enabled = true
  servers = ["192.168.0.51","192.168.0.61","192.168.0.62"]
}
EOF
참고URL
- Nomad Vocabulary : https://developer.hashicorp.com/nomad/tutorials/get-started/get-started-vocab
728x90
반응형
'리눅스' 카테고리의 다른 글
| envoy를 사용하는 도커 컨테이너 리버스 프록시(docker container reverse proxy) (0) | 2023.01.29 |
|---|---|
| traefik을 사용하는 도커 컨테이너 리버스 프록시(docker container reverse proxy) (0) | 2023.01.27 |
| HashiCorp Nomad 서버를 설치하고 구성하는 방법 (0) | 2023.01.27 |
| consul 서비스 등록 (0) | 2023.01.27 |
| systemctl status 명령어 (0) | 2023.01.27 |


